The printable version is no longer supported and may have rendering errors. Please update your browser bookmarks and please use the default browser print function instead.
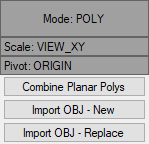
This is an overview of the Overload DMesh Editor which comes delivered with the Level Editor
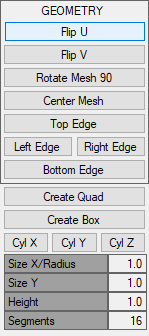
Top\Left\Right\Bottom Edge: Moves the entire mesh to one of the 4 sides of the 4x4 editing area from it’s last relative position
Create Quad: draws a square box (2D) at elevation 0 using the values in Size X\ Radius & Size Y
Create Box: draws a cube at elevation 0 using Size X, Size Y & Height
Cyl X\Y\Z : Draws a cylinder along the noted axis (X\Y\Z) defined using Size X\Radius and Height and Segments values
Geometry Manipulation
Copy Marked Polys\Paste Marked Polys: Same as Ctrl-C\Ctrl-V. Copies and pastes in place (superimposed)
DupX \ DupZ: Mirror the selected polygons along the noted axis.
Dup4 : Copies the marked polygons to create an array of 4 objects at 90 degrees to each other about the center of the work area
Dup3 : Copies the marked polygons to create an array of 3 objects at 120 degrees to each other about the center of the work area
Mark Untextured: Marks polygons with no texture assignment
Mark Duplicates: Marks polygons that are superimposed
Mark Connected: Marks polygons that are geometrically touching the selected polygon
Mark CoPlanar: Mark polygons that are geometrically connected and within the angular tolerance of the CoPLanar Angle input box
Spacing\Snap\Width: All effect the grid display and snap increment for editing
Snap Marked to Grid: Snap marked polygons to nearest grid point as defined by the Snap setting above
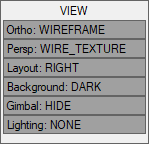
View Settings
These settings are similar to the view settings in the Level Editor
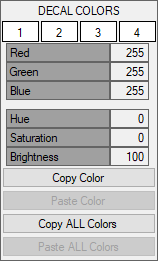
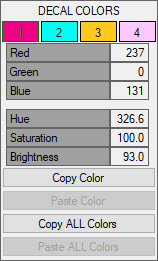
Colors
* Each dmesh file can have 4 colour assignments. Clicking within the color box and using the mouse button to slide the values left or right changes the colour.
* Colours can be copied\pasted within files and across files as well. These are used primarily for Lights (see note next section).
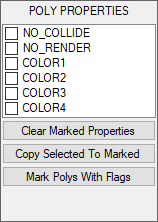
Poly Properties
I have never been able to use these to colour polygons and then NOT have the level editor crash on startup when parsing the dmesh folder. So polygons likely need to be textured and not coloured
I am assuming the color panel should only be used for lights and not polygon properties. Or perhaps I am doing something wrong.
NO_COLLIDE & NO_RENDER apparently have some bearing on high-polygon count files, but these don’t appear to be set in any of the delivered files
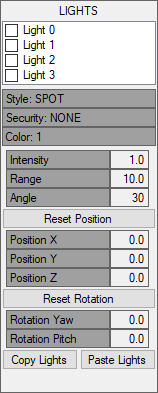
Lights
Similar to the 4 colours available in a decal, each decal can also have 4 lights assigned.
To add a light or turn one off (hide) double-click the Light n checkbox.
These settings are similar to adding light entities in the level editor, with the exception of the Position & Rotation boxes which are used to locate the lights within the decal mesh file.
Select the desired light and drag the mouse button left or right (or left-click and right-click) to move the values up or down in the Position & Rotation boxes. This updates the light glyph in the editor in real time.
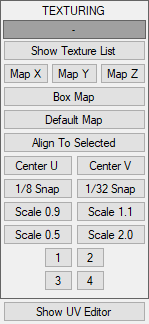
Texturing
This is almost identical to the texturing panel in the level editor with the exception of a few additional shortcut buttons which make it easier than going into the UV editor
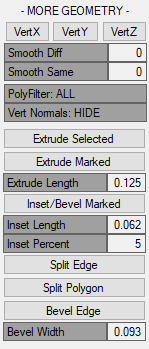
More Geometry
VertX\VertY\VertZ: Line up all marked vertices with the selected vert along the axis noted. This can sometimes create zero area segments so use with caution. Should use Merge Overlapping Verts command after this command
Smooth Diff\Smooth Same: Used to smooth out the final mesh when compiled in the level, but makes editing extremely slow. Usually best to set this to zero while editing and then set it back to a higher number when saving.
PolyFilter: ??
Vert Normals: Shows (or hides) the spline normals for the vertices. Not sure how useful it is, but there it is if that’s your thing….
Extrude Selected\Marked: Same as Extrude in the level editor
Inset\Bevel Marked: Similar to extrude, except the resulting poly is scaled down by the Inset Percent value to create a bevel
Split Edge: Adds a vertice between 2 marked vertices. Can be useful when creating freeform geometry
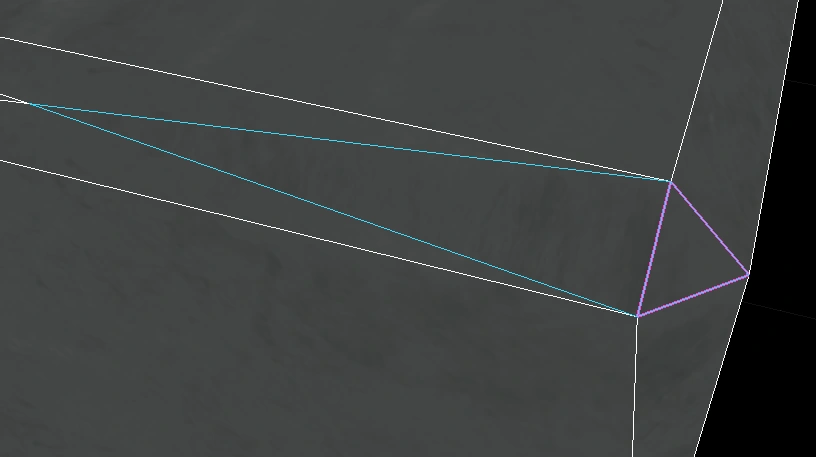
Split Polygon: Splits a polygon in 2 between 2 marked non-coincident verts (they can’t be right next to each other). Mark the top right and bottom left of a square, this will create 2 triangles (the quad split in 2)
Bevel Edge: Takes 2 or more planar marked vertices, and generates polygons to create a bevel edge using the value of Bevel Width. Easiest approach is 2 verts at a time until you get proficient, but this is an easy way to round over square edges. The resulting polygons are untextured.
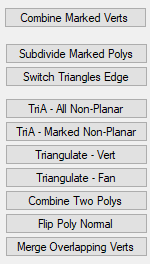
Miscellaneous
Combine Marked Verts; Combines all marked verts into a single vertice, changing the polygon geometry. This is a quick way to turn a square into a triangle, or a cube into a pyramid for example. This can easily create some invalid geometry if you don’t pay attention
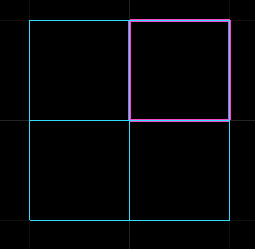
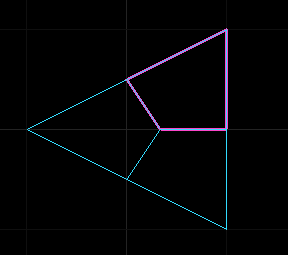
Subdivide Marked Polys into Quads: Subdivides an existing polygon into smaller 4-sided quads where possible (basically adding polygon count). For example, turns a single square into 4 squares, or a triangle into 3 quads
Switch Triangle Edges: Takes 2 adjacent triangular polygons and flips the matching side perpendicular to itself
TriA - All Non-Planar: This takes any degenerated quads and subdivides them into triangular polys
TriA - Marked Non-Planar: Same as above but only applies to marked polygons
Triangulate Vert: Mark a polygon in POLY mode, then switch to Vert mode and select a vert. This is supposed to split the poly into triangles based on the selected vert, but sometimes it chooses a different vertice
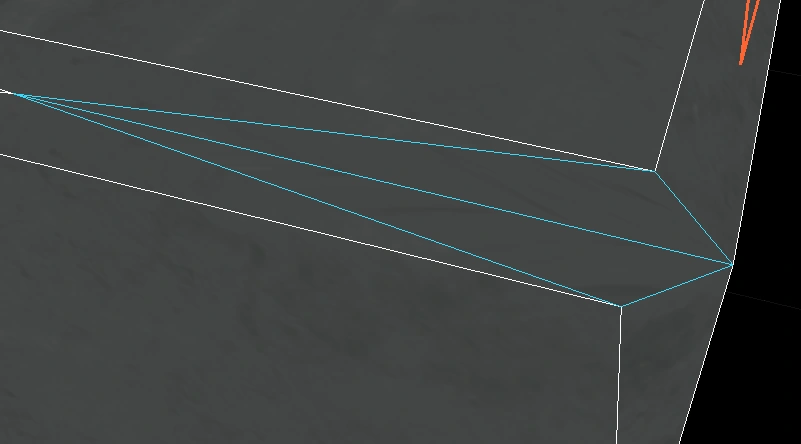
Triangulate Fan: This turns a quad into 4 triangular polygons.
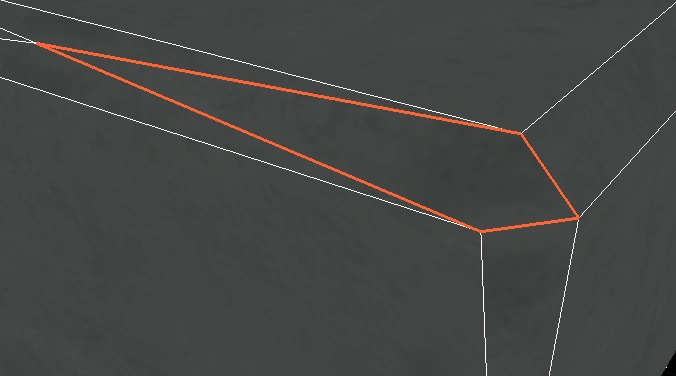
Combine Two Polys: Combines 2 marked adjacent triangular polygons into a single polygon. This is similar to the Combine Planar Polys button in the Modes toolbox, except that works against the entire file
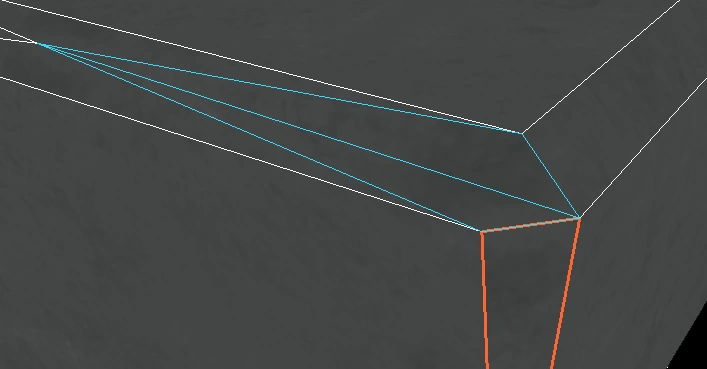
Flip Poly Normal: Flips the visible side of the selected or marked polygons.
Merge Overlapping Verts: Often used for cleanup where vertices are superimposed after editing
DMesh Browser
Launches a list view to browse dmesh files from disk. It has 2 options: Save & Load. By default Load is ON and Save is OFF.
With Load set to ON, whenever a mesh is selected in the browser it is auto-loaded.
With Load set to OFF, the Load Selected button is enabled in order to load the selected mesh
With Save set to ON any file loaded into the editor is auto-saved regardless of whether or not a change occurred. This is probably best left OFF (unless you want timestamp a bunch of files?)